
iPhone Jailbreak, Start-to-Finish
It appears that I promised a full iPhone jailbreak guide in an earlier rgbFilter post. I have since lost any memory of doing it. Fortunately, I actually wrote out all the steps before my latest schism, and have since recovered them for you from my lifestream. Here is the entire rest of the series. Make sure you reread the caveats in that first post!…
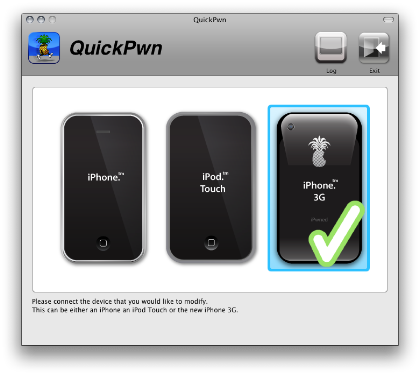
QuickPwn 2.2.5 identifies which iPhone model to jailbreak…
*** These observations only apply to the iPhone 3G and are not intended as a replacement for reading any of this ***
Once you are certain you are running the correct version of QuickPwn for your iPhone software (you can check this in your iPhone’s Settings > General > About page), connect your iPhone, do a sync/backup, and then run QuickPwn after quitting iTunes. (Which I didn’t, at first, perhaps resulting in the two crashed-out runs I experienced before finally getting successfully to the big green checkmark, above.)
Notice how there’s no ‘Continue’ button in the above window? No need: the program automatically moves onto downloading a jailbroken firmware bundle. I found the delay way too short. I had to cancel out and relaunch so I could be ready the second time and make sure to get a glimpse that the correct phone type had been detected.
The first time you run this, you will get a message like so: “No iPhone 3G firmware bundle found! Would you like to automatically download it?” The answer is yes! The firmware bundle is the transplant code that is destined to be sewn into your phone, and the dialog box you will see right after the green checkmark, is the safest source. Some of you may have also come across firmware bundles linked for download alongside QuickPwn on fourth-party sites (You + Apple + DevTeam + ??). Don’t do it! Why multiply risks? Even if you have already downloaded a correctly-labelled firmware bundle from somewhere else, as I had, I would suggest you just redownload it directly from DevTeam, through QuickPwn, if for no other reason than for the peace of mind that whatever problem you might run into, a maliciously corrupted firmware bundle won’t be the cause of it!
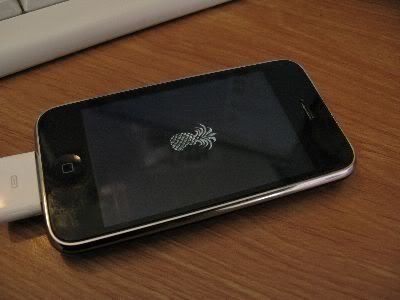
“Would you like to replace the original boot and restore logos that are on your iPhone 3G?”
The rebooting iPhone pictured above is not what you should be seeing right now if you are following the process. I just included it here as a glimpse forward to what is being referred to in this next and last question you’ll be asked by QuickPwn 2.2.5, before you reach the point of no return. After you choose whether or not to replace the logo with that pineapple there, and you see the installation progress bar begin, cancellation will no longer be a viable option: Do not. Even Try.
As you can see, I chose to replace the boot and restore logos, even though every instinct I have was telling me not to. When evaluating a technology hack on this planet, I suggest you use a rule of thumb that generally resembles this one:
(reliability of source site) x (productivity gain)
÷
(distance from the moment of boot, in seconds)
The reason distance from the moment of boot (short for ‘bootstrap’) is a factor, is that more vital, riskier-to-hack OS components tend to load first. But since the productivity gain for a change of boot logo is zero, no matter what you plug into the other values, the reward/risk value of the boot logo hack, is still zero.
It’s not actually a big deal, since the simple swapping out of an image is hardly complex enough to get bug-prone, but since there is no technological upside, I would have to say it’s not worth it.
So why did I do it?
Considering how I feel about the ironfisted manner in which Apple has been running its iPhone App Store, jailbreaking my iPhone and joining this community is something that I consider not only useful, but a moral imperative. I already feel guilty enough for even buying a phone whose manufacturer has been actively engaged in censorship of the Arts. If I couldn’t jailbreak this iPhone, there would be no way, so it’s really the hackers that closed the deal on this product. The new logo is well deserved. Thank you, DevTeam!
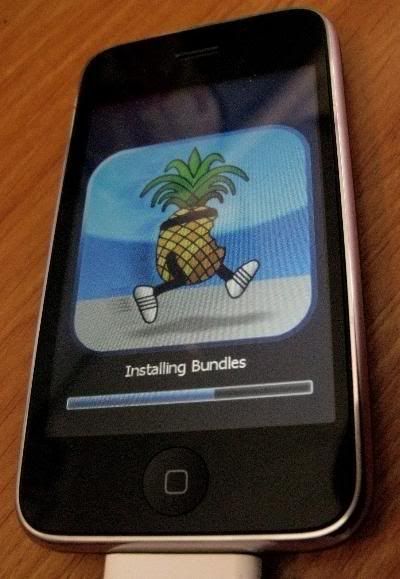
iPhone jailbreaking in progress…
As I mentioned earlier, after choosing whether to install the boot logo, you will cross the point of no return. This point will be recognisable by the way QuickPwn suddenly asks you to press buttons on your iPhone by some very precise timing. (You will be asked to hold down the circular ‘Home’ button and the top-right power button simultaneously for 10 seconds, and then to release the power button at exactly that 10 second mark but keeping ‘Home’ pressed down for another 10 seconds.)
This will put your iPhone in ‘DFU mode‘. This is not a mode specific to jailbreaking; it’s a mode designed by Apple to allow a deep restore of the iPhone software. QuickPwn doesn’t mention this mode by name, but I’m informing you of the name because there is an important pitfall here in that ‘DFU mode’ just doesn’t work anymore with newer Macs running OS X 10.5.6. (If you’re on 10.5.5., you’re fine — do the jailbreak and then just skip ahead to my quick/dirty Cydia FAQ, below.)
You’ll find a rather complex workaround in the QuickPwn release info, involving signing up for an Apple developer account so you can download a downgrade to your USB drivers from 10.5.6 to 10.5.5. I wouldn’t personally recommend this solution. This is an Apple bug that affects jailbreakers and nonjailbreakers. There will be a fix. If this issue affected my Mac mini (luckily, it didn’t), I would have just waited before jailbreaking, rather than messing with my OS X install for the sake of a fix that will only be necessary over the short term.
But I have read on several forums now that plugging your iPhone into a powered USB hub, rather than directly into your Mac, bypasses the Mac’s USB bug and allows you to use DFU mode, and thus, to jailbreak. I couldn’t test this myself, but it’s not a difficult thing to try if you have this issue. Just put your iPhone in DFU mode first, using iClarified’s instructions here, just to make sure you can. (Don’t worry, you don’t have to actually go through with a deep restore — just quit iTunes when it asks you if you want to restore: but as long as it did ask you, you were successfully in DFU mode.) Once you have performed this simple test, you’ll know that you can go through with the jailbreak successfully.
Quick/Dirty Cydia FAQ…
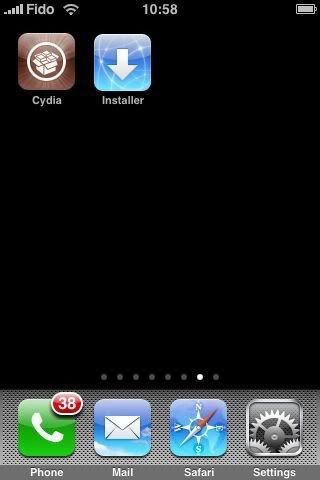
If you’ve been following me so far… congratulations! You’re free as a bird. But I’m not going to lie to you and say that the user experience of installing jailbroken apps can hold much of a candle to the App Store. (Once installed, though, you won’t even notice which apps are jailbroken and which not.) The jailbreaking community does not exactly overflow with newbie definitions for its terms. Here are the answers to some of the questions that may vex you early in your stay.
What’s the difference between Cydia and the Installer? – They’re two different versions of the same thing. Installer was the first, Cydia came along later and became much more popular (probably because of the auto-commerce ‘store’ features for paid apps). Cydia has a much bigger standard library, but I have found some apps in Installer only. Some apps are available through both. It’s a bit unruly, but that’s just the way it is: there are two. Install both of them.
What is a ‘source/repository’? – When Cydia or Installer mention ‘sources’ they usually aren’t talking about source *code*, but just sources of more lists of installable programs that are out there. Both app installers come knowing the addresses of certain ‘repositories’ of such app lists, but neither knows all of them on the planet – there are more repositories out there. This isn’t the App Store, so everybody isn’t forced to go through Darth Vader if they want to put out a red light saber. It’s decentralised. There are plenty of good apps in there by default, but the opportunity to add even more alternative, more homegrown sources, that’s a big plus. The reason you are jailbreaking is freedom, and this layer of complexity just means more of it, that’s its reason for being. And it’s a good one.
What’s with all the seasonboards? Springboard, Winterboard, etc.? And what is ‘respringing’? – The ‘Springboard’ is Apple’s internal developer name for the application that draws your ‘home screen’ and handles all the icon swiping. That’s your ‘springboard’. Respringing just means restarting your Springboard app, and it is done automatically after installing certain UI modifications and other types of apps. Winterboard and any other types of ‘boards’ besides the Springboard, are independent programmers’ attempts to follow Apple’s naming style: in Winterboard’s case, for a hack that allows you to customise and add themes to your Springboard.
Well, those are the main three sets of definitions that once I got them under my belt, I was able to navigate Cydia and the Installer with a lot less bewilderment. If I think of any more I will add them in future posts on this.
NEXT: CYDIA APPS FOR A TIME WALKER’S PHONE
[Submitted by The Laroquod Experiment.]


[…] LATER: CHEAT SHEETS FOR THE QUICKPWN DIALOGS […]
[…] handset! It took a little bit of screwing with to get right, but there is an MPlayer app on Cydia you can use to watch this forbidden format. With a few skips and jumps, and provided you […]
105031 551137Enjoyed reading this, very very good stuff, thankyou . 966337